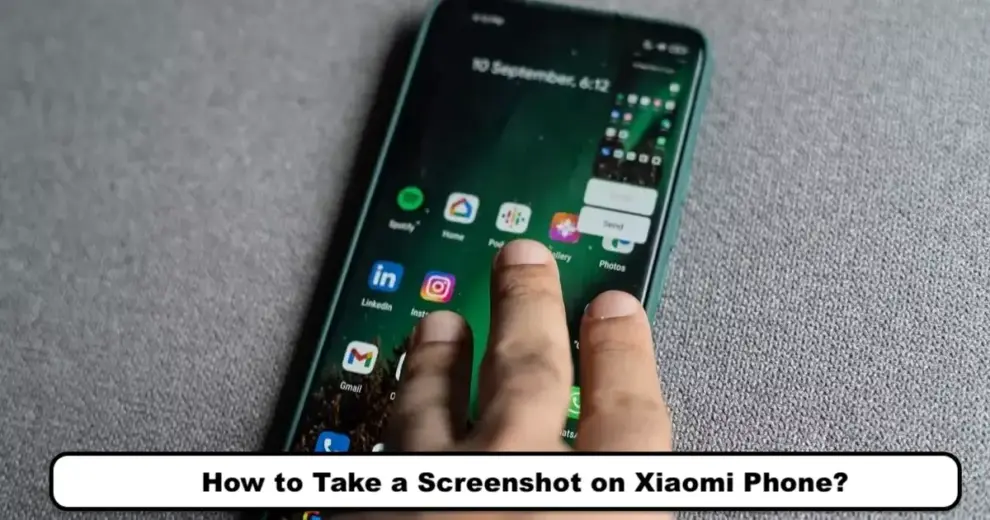
Xiaomi’s MIUI is known for its extensive customization options and user-friendly features, and taking screenshots is no exception. Beyond the traditional button combination, MIUI offers several clever ways to capture your screen, making the process quick and efficient. These methods leverage gestures, on-screen shortcuts, and accessibility features, providing flexibility for all users.
Method 1: The Three-Finger Swipe Gesture
This is arguably the most popular and intuitive button-free screenshot method on Xiaomi devices. It’s often enabled by default.
Step-by-Step:
- Enable the Gesture (if not already active):
- Go to Settings.
- Scroll down and tap on Additional settings.
- Tap on Gesture shortcuts.
- Find and tap on Take a screenshot.
- Ensure the “Slide 3 fingers down” option is toggled On.
- Take the Screenshot:
- With three fingers, simultaneously swipe downwards on any screen you wish to capture.
- You will see a quick animation, hear a shutter sound (if sound is on), and a small preview of the screenshot will appear at the top right (or top left) of the screen.
- Interact with the Screenshot:
- Tap the preview to edit or share it immediately.
- If the content you’re capturing extends beyond the screen (e.g., a long webpage or chat), tap the “Scroll” option on the preview to take a long screenshot (also known as a scrolling screenshot). The screen will automatically scroll, capturing the entire content until you tap “Done” or it reaches the end.
- If you do nothing, the screenshot will automatically save to your Gallery.
Method 2: Using the Notification Shade / Control Center Toggle
Xiaomi‘s Quick Settings panel (often referred to as the Notification Shade or Control Center) includes a dedicated screenshot toggle for quick access.
Step-by-Step:
- Pull Down the Notification Shade/Control Center:
- Swipe down from the top right corner of your screen (for Control Center style) or from the top of the screen (for old Notification Shade style).
- Locate the Screenshot Toggle:
- Look for an icon that resembles a pair of scissors over a square, or simply says “Screenshot” or “Ss“. You might need to swipe left or right on the quick toggles, or tap the “Edit” icon (often a pencil or square) to find and add it if it’s not visible.
- Tap the Screenshot Toggle:
- Tap this icon, and your phone will immediately capture a screenshot of the current screen.
- The same preview and options for editing, sharing, or taking a long screenshot will appear.
Method 3: The Quick Ball (Floating Button)
The Quick Ball is a customizable floating button that provides quick access to various functions, including screenshots. It’s particularly useful for one-handed operation.
Step-by-Step:
- Enable Quick Ball:
- Go to Settings.
- Tap on Additional settings.
- Tap on Quick ball.
- Toggle “Turn on Quick ball” to On.
- Customize Quick Ball Shortcuts (Optional but Recommended):
- In the Quick Ball settings, tap on “Select shortcuts”.
- Ensure that “Screenshot” is one of the selected shortcuts. You can customize the five available slots to your preference.
- Take the Screenshot:
- A small, translucent floating circle (the Quick Ball) will appear on the edge of your screen. You can drag it to any convenient position.
- Tap the Quick Ball. A small menu will expand.
- Tap the Screenshot icon (usually scissors or a camera).
- The screenshot will be captured, and the preview will appear as usual.
Method 4: Using the Accessibility Menu
The Accessibility Menu is an Android feature that provides on-screen controls for various system functions, designed primarily for users with accessibility needs but useful for anyone preferring on-screen navigation.
Step-by-Step:
- Enable Accessibility Menu:
- Go to Settings.
- Scroll down and tap on Additional settings.
- Tap on Accessibility.
- Tap on Accessibility Menu.
- Toggle “Accessibility Menu shortcut” to On.
- Confirm the permission when prompted by tapping “Allow”.
- Access the Accessibility Menu:
- A small, floating accessibility icon (often a human figure) will appear near the navigation bar (or just above it if you use gestures).
- Tap this icon.
- Take the Screenshot:
- A large menu of on-screen controls will appear.
- Tap the “Screenshot” option (usually represented by an icon of a screen or camera).
- The screenshot will be taken, and the preview will appear.
Historical Context of Screenshots and MIUI
The concept of a screenshot (or screencap, screen grab) dates back to the early days of computing, long before smartphones. Early methods involved complex keyboard combinations or specialized software. With the advent of smartphones, the need for a simple, universal way to capture on-screen content became apparent. Android, from its early versions, adopted the Power + Volume Down button combination.
However, as smartphone usage became more diverse and physical buttons sometimes wore out or became inconvenient (especially on larger phones), manufacturers like Xiaomi began innovating. Xiaomi’s MIUI was one of the pioneers in offering alternative screenshot methods, notably the three-finger swipe gesture, which gained immense popularity for its speed and ease of use. This continuous evolution in user interface design reflects a commitment to enhancing user experience beyond basic functionalities.
Frequently Asked Questions (FAQ)
Q1: Why would I want to take a screenshot without using buttons on my Xiaomi phone?
A1: There are several reasons:
- Convenience: Gestures like the three-finger swipe can be faster and more natural than fumbling for physical buttons.
- Button Malfunction: If your power or volume buttons are broken or unresponsive, these methods provide a workaround.
- One-Handed Use: On-screen shortcuts like the Quick Ball make it easier to take screenshots with one hand on larger phones.
- Accessibility: The Accessibility Menu provides a dedicated, easy-to-tap button for users who might struggle with physical button combinations.
Q2: What is a “long screenshot” and how do I take one on Xiaomi?
A2: A long screenshot (also called a scrolling screenshot) captures content that extends beyond your current screen view, such as an entire webpage, a long chat conversation, or a document. After taking a regular screenshot using any method, a small preview will appear. Tap on this preview and then select the “Scroll” option (or similar wording like “Long screenshot”). Your phone will then automatically scroll and capture the remaining content, which you can stop at any point by tapping “Done”.
Q3: My three-finger swipe isn’t working. How can I fix it?
A3: If the three-finger swipe isn’t working, it’s most likely because the feature is not enabled.
- Go to Settings.
- Tap Additional settings.
- Tap Gesture shortcuts.
- Tap Take a screenshot.
- Ensure “Slide 3 fingers down” is toggled On. If it’s already on, try toggling it off and then on again, or restart your phone.
Q4: Can I customize the Quick Ball shortcuts to include screenshot?
A4: Yes, absolutely. The Quick Ball is highly customizable. After enabling it (Settings > Additional settings > Quick ball > Turn on Quick ball), go to “Select shortcuts” within the Quick Ball settings. From there, you can choose which five functions or apps you want the Quick Ball to provide quick access to, including the screenshot function.
Q5: Where are the screenshots saved on my Xiaomi phone?
A5: All screenshots taken on your Xiaomi phone are saved in your device’s internal storage, typically within a folder named “DCIM/Screenshots” or directly in the “Pictures/Screenshots” folder. You can access them through your phone’s Gallery app, usually in a dedicated “Screenshots” album.


Add Comment